|
CRYSTALS Contents+ Frequently Asked Questions + Crystals Primer + Crystals User Guide + Crystals Manual + Cameron Manual + Menu and toolbar + Getting Started + IndexManuals built:
|
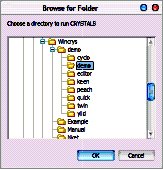
Crystals Worked ExamplesChapter 1: Getting Started[Top] [Index] Manuals generated on Wednesday 27 April 2011 1.1: Starting the programDouble click on the CRYSTALS icon on the desktop, the "Browse for Folder" dialog will be displayed. The selected directory should already be demo, if it isn't then browse to find it: c:\wincrys\demo\demo, highlight it and then click OK.
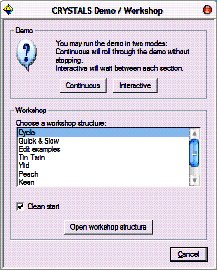
CRYSTALS will start, and the demo / workshop dialog will open automatically.
Choose Cyclo from the list of workshop structures and click "Open workshop structure". We will use this starting point throughout the workshop to choose different starting structures. To bring this dialog either close and restart CRYSTALS, or choose "Demo" from the "Help" menu. [Top] [Index] Manuals generated on Wednesday 27 April 2011 1.2: Customising CRYSTALS to suit your screen size
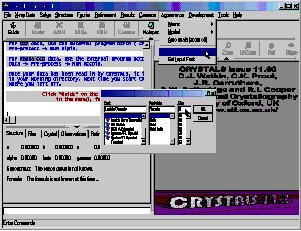
It is important to be able to read the text output in the left hand pane of the CRYSTALS window. From the menus choose "Appearance"->"Set Text Font" Choose the smallest font size that you can read. I would recommend Lucida Console in size 7.
The area on the right will eventually display a representation of the atomic co-ordinates, so leave it at least a little bit of space. |

© Copyright Chemical Crystallography Laboratory, Oxford, 2011. Comments or queries to Richard Cooper - richard.cooper@chem.ox.ac.uk Telephone +44 1865 285019. This page last changed on Wednesday 27 April 2011.